High Hydration, Long-Fermented Sourdough Bread Recipe
Print RecipeEquipment
- Two bowls, or one bowl and one proving basket
- 2-4 Clean tea towel or dish towels
- Kitchen scale
- Parchment paper that can withstand 450 degrees
- Dutch oven
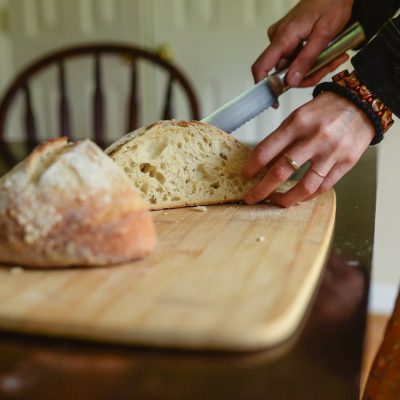
- Knife or bread Lame (scoring blade)
- Optional but helpful: bench scraper, dough whisk, fork, plastic oven bag
Ingredients
- 50 g starter about 1/8 cup
- 375 g filtered water, warmed slightly about 1 1/2 cups
- 500 g organic unbleached bread flour or all-purpose flour about 4 cups
- 10 g sea salt about 1-2 teaspoons
- 10 g honey (optional)
Instructions
- Feed your Starter: about 3-4 hours before starting your dough, feed your starter, covering it and letting it rest for a couple of hours until it’s bubbling and doubled in size.
- Making the Dough: Using your kitchen scale, add 50 grams of starter and 375 grams of warm filtered water to a bowl. Mix to combine using a fork or dough whisk. Add 500 grams organic unbleached bread flour and 10 grams salt to the same bowl. Combine with a fork, dough whisk or your hands until it resembles a shaggy dough. Cover with a clean towel for 1 hour and let rest.
- Stretch and Fold: Stretch and fold the dough every 30 minutes for a total of 4 times over the next 2-2.5 hours. Between stretch and folds, cover bowl with a damp towel, plastic lid, or plastic wrap over the rim of the bowl. Pro tip to keep your dough from sticking to your hands- dip your hands in a little bit of water before stretching and folding. After your stretch and folds, the dough should firm up a little bit and have a nice gluten structure.
- Bulk Rise: Let your dough rest for 8-10 hours (during winter; 6-8 hours in summer) in the bowl on the counter or in a warm space, covering it with a clean damp towel or a plastic lid. Your dough should rise by 1/3 or double in size over this time.
- Shape: Prep your banneton basket/proving bowl by dusting it with flour (I prefer rice flour) or by placing a flour-covered towel inside the bowl. Then scrape down the sides of the bowl using your dough scraper, folding the dough onto itself. Lift the dough ball out of the bowl, gathering the sides with your hands and placing the smooth side into the floured bowl. The rough edges will be visible on the top.
- "Sew the Seams": At this point, "sew up the seams" of the dough in the proving basket by gently pinching the top of the dough together. Some people describe it as sewing the seam because you want to fold a bit of the top of the dough over itself, pinching the top of the dough multiples times, creating a seam. Do this whole process 2-3 times, waiting 5-10 minutes in between. This will tighten the dough sufficiently. Cover with another clean, damp towel to avoid a dry/crusty dough..
- Long-Fermentation Rise in Fridge: Place your floured bowl or proofing basket in the fridge for 48-72 hours. If you don't want to long-ferment your dough and would rather bake it immediately, you can bake it after 1-2 hours in the fridge.
- Preheat: If you do choose long fermentation, after 72 hours, preheat your oven to 500 degrees Fahrenheit, preheating your Dutch oven inside the oven at the same time.
- Last Rise and Scoring: Just before the oven fully heated, take out your dough from the fridge and flip the dough out onto parchment paper so that the bottom of the dough is now on top. Lightly dust the top of the bread dough, and then score the top of the dough using a sharp knife or bread lame with any design (such as an X, a ( or a + ) which will allow for the bread to expand as it goes in the oven.
- Bake: When the Dutch oven is pre-heated, place the parchment paper with the dough in the Dutch oven and cover with the Dutch oven lid. Bake for 20 minutes at 500 degrees Fahrenheit. Then remove the lid on the dutch oven and bake for 10 minutes or more depending on desired crust. If you are unsure whether your bread is cooked all the way through, check with a thermometer and make sure it reads between 200-210 degrees F. Once your bread is cooked and has a nice desired color on top, remove it from the Dutch oven to sit on the counter and let cool for 1 hour before cutting into it. Enjoy!
Notes
Note: The long fermentation process is not necessary to baking bread although it does help increase the antioxidant activity within the bread. You can always bake your bread immediately after the Bulk Rise or anytime within 3 days.